Tank Allocation
General Information
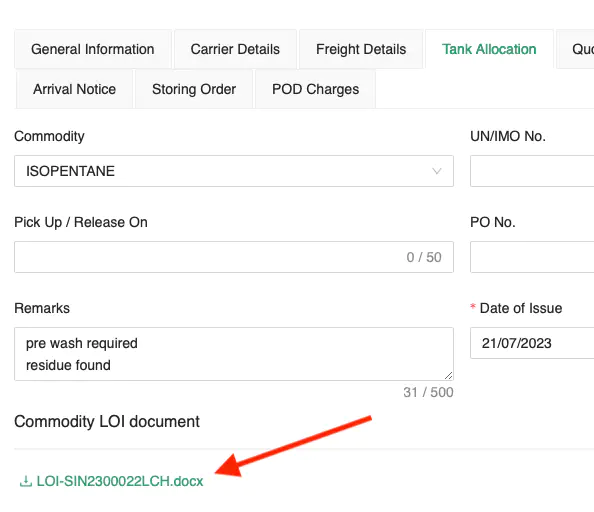
Upon selecting a Commodity, the UN/IMO No. and DG Class information are populated directly from the System Code.
If the selected Commodity has an accompany LOI document, it will be available for download.
Workflow
The tank allocation workflow is as follows:
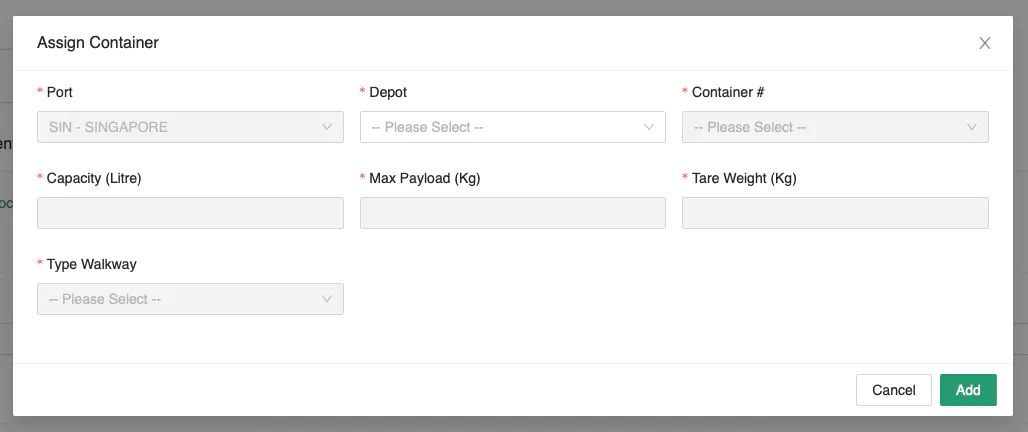
Assign Container
Provide
Estimated Date of Releasefor the Release Order(s)Provide
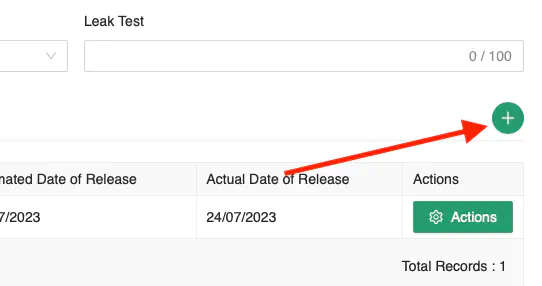
Actual Date of Releasefor the individual containers via Edit Containers
Containers
The Containers section allows you to assign and manage containers for this Job. You may enter the criteria of the containers accordingly.
Assign Containers
Click the + icon to assign a new container.
The Assign Container form will be displayed.
Business Logic:
The system will default
Portto the same Port as thePort of LoadingThe system will apply the criteria provided and filter the container(s) accordingly
The Depot field is automatically filtered based on the selected Port, and the Container # is automatically filtered based on its location and availability after user has selected a Depot.
Ensure that all fields are input correctly and click Add to add the container to the list.
Edit Containers
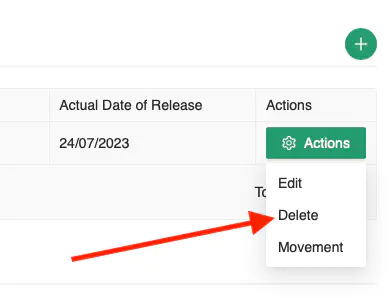
Click [Actions] → Edit to edit the selected record.

Once you have amended the entry, click [Update] to save the record.
The same Business Logic from Assign Containers applies.
Delete Containers
Click [Actions] → Delete to delete the selected record.
A confirmation prompt will appear. Click [Ok] to proceed with the deletion.
Container Movements
Click [Actions] → Movement to view the container’s movement.
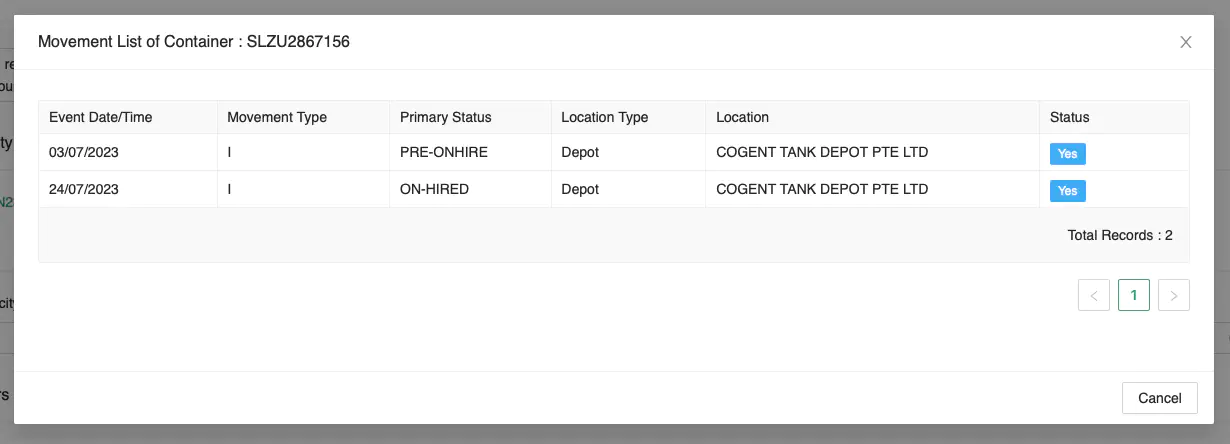
A list of all movements of the selected container will be displayed.
Release Orders
All assigned containers are automatically grouped under Release Orders based on their Depot.
Enter the Estimated Date of Release.
Enter the Additional Information.
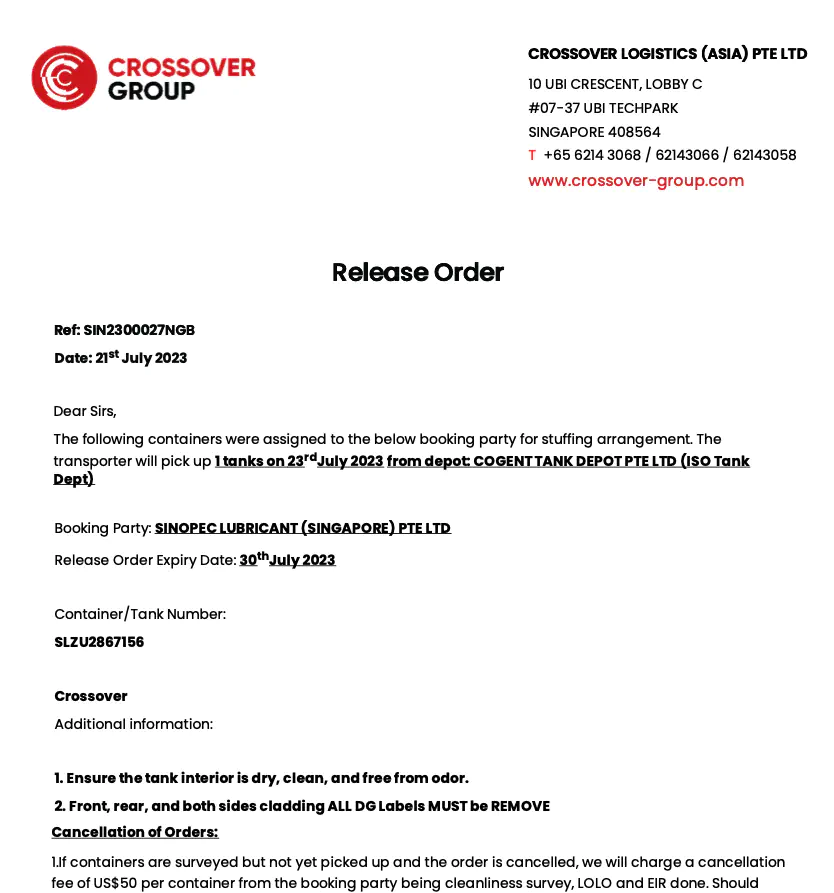
Print Release Order
Click [Actions] → Print RO to print the selected release order.
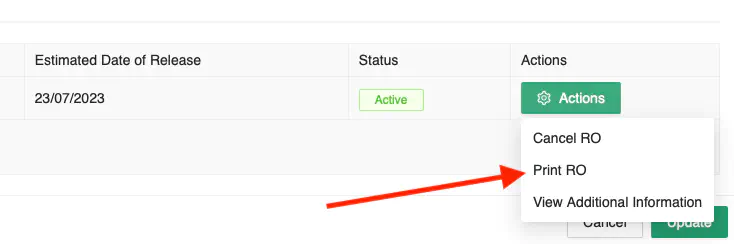
A new window with the release order will be displayed.
View Assigned Containers
Click on the number under the Numbers of Containers column to view the assigned containers under this release order.
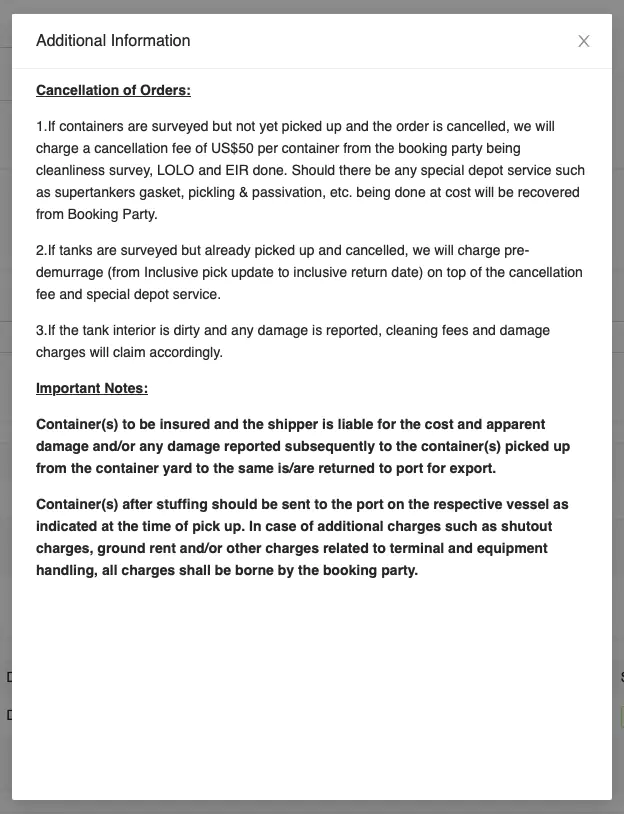
View Additional Information
Click [Actions] → View Additional Information to view the additional information for the release order.
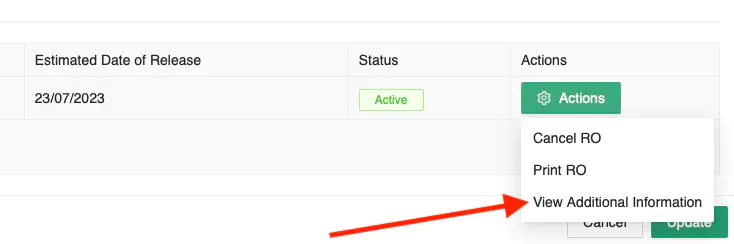
A popup with the additional information is displayed.
Cancel Release Order
Click [Actions] → Cancel RO to cancel the selected release order.
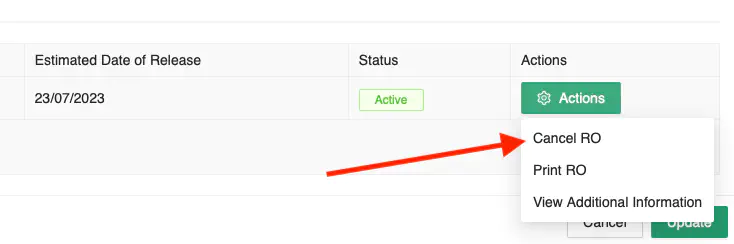
A confirmation prompt will appear. Click [Ok] to proceed with the cancellation.